Ghost is an open source customizable blogging platform that makes it easy and simple to write and publish articles. We keep hearing good things about it so we decided to give it a try and document it here so anyone that chooses Ghost can follow along to get their own blog up and running. As of this post, three of the latest feature to be added to Ghost are: custom post meta data, autosave and structured meta data.
Before we get started, make sure you sign up for a new account through our link and get your $10 credit which is equal to two months of free service on the 512MB plan!
After you sign up and login:
1-click on Create Droplet
2-type in your Hostname
3-Select Size (512MB is a good start)
4-Select Region (choose one nearest you)
5-Select Image (we selected Ubuntu 14.04×64)
click the Create Droplet button at the bottom of the page to start the process
Once everything completes, you’ll see your server address at the top of the page. Make a note of that.
Ghost is an open source customizable blogging platform that makes it easy and simple to write and publish articles. We keep hearing good things about it so we decided to give it a try and document it here so anyone that chooses Ghost can follow along to get their own blog up and running. As of this post, three of the latest feature to be added to Ghost are: custom post meta data, autosave and structured meta data.
[gallery columns="5" link="file" ids="270,271,272,273,274"]
Before we get started, make sure you sign up for a new account through our link and get your $10 credit which is equal to two months of free service on the 512MB plan!
After you sign up and login:
1-click on Create Droplet
2-type in your Hostname
3-Select Size (512MB is a good start)
4-Select Region (choose one nearest you)
5-Select Image (we selected Ubuntu 14.04x64)
click the Create Droplet button at the bottom of the page to start the process
[gallery link="file" columns="4" ids="290,291,289,293"]
Once everything completes, you'll see your server address at the top of the page. Make a note of that.
Open terminal and sign in to your server:
ssh root@216.239.32.10
Note: replace 216.239.32.10 with your own server address
Let's start by making sure the packages are up-to-date:
sudo apt-get update && sudo apt-get upgrade
Now to install everything we need:
sudo apt-get install nginx npm nodejs unzip
sudo ln -s /usr/bin/nodejs /usr/bin/node
Create the NGINX server block:
sudo nano /etc/nginx/sites-available/ghost
Now add the following so it knows where Ghost is located:
server {
    listen 80;
    server_name localhost;
location / {
    proxy_set_header X-Real-IP $remote_addr;
    proxy_set_header HOST $http_host;
    proxy_set_header X-NginX-Proxy true;

    proxy_pass http://127.0.0.1:2368;
    proxy_redirect off;
}

}
Save the file and exit
Now it's time to activate the new and then remove the server default:
sudo ln -s /etc/nginx/sites-available/ghost /etc/nginx/sites-enabled/ghost
sudo rm /etc/nginx/sites-enabled/default
Download the latest version of Ghost:
curl -L https://ghost.org/zip/ghost-latest.zip -o ghost.zip
Extract the files from within the downloaded file:
unzip -uo ghost.zip -d ghost
Switch to the ghost folder:
cd ghost
Start the installation:
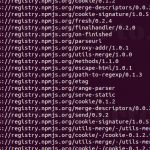
npm install --production
You should see the following. Just wait until it completes.
To ensure Ghost runs after we logout of our server and if Ghost ever crashes:
sudo npm install forever -g
forever start index.js
exit
Note: if you do not want to use 'forever' from above you can also do the following:
sudo npm install pm2 -g
pm2 start index.js --name "blog"
exit
That's it! Open your web browser, type in the address of your server and you'll see that Ghost is installed and ready for you.
By adding the word ghost to the end of the URL, it will redirect you to create your account: http://216.239.32.10/ghost

Again, replace 216.239.32.10 with your own server address
You can view our demo at http://demo.devporto.com/
Important!!
At the start of this article you signed in as root. For security reasons, we recommend that you immediately create your own account for access from this point forward. Make sure you read the section 'secure your account' in the Prepare A Basic Ubuntu Server guide.
Our followers created their own blog with average time from start to finish: 20-35 minutes
For those that don't like to read, just copy and paste the commands for faster time. How fast are you?
We're here to help you!
Leave a comment if you encounter any issues or have any questions.


